Create a Custom Connector to a MCP Server with Entra ID Authorization
MCP Servers can utilize Entra ID authorization. This guide is aimed at integrating such servers in M365 Copilot Studio so they can be made available for Microsoft Copilot and Microsoft Teams.
Requirements:
- A working MCP Server with Entra ID Authorization
- VS Code for running the MCP Server locally (for debugging)
- Azure Entra ID
Initial setup
- Setup your MCP Server with Entra ID authorization to run locally. If you do not have one yet, find inspiration here: https://blog.mitchbarry.com/net-mcp-server-oauth-with-microsoft-entra-id/
- Ensure that your authorization flow runs as expected when using the VS Code mcp client: https://den.dev/blog/vscode-authorization-mcp
- Setup port forwarding and set the port to public: https://code.visualstudio.com/docs/debugtest/port-forwarding
Create an App Registration
The Power Automate connector for MCP servers requires an App Registration. The App Registration needs to have access to the API exposed by your MCP Server and it’s scope. You need to know the Application (Client) ID and the scope of the App Registration you use for your MCP Server. In this guide the following values will be used for the existing MCP Server App Registration:
Application (Client) ID: MyAppRegistrationsGUID
Scope: MyAppRegistrationsScope
Open Azure Portal and go to Entra ID -> App Registrations and create a New registration.
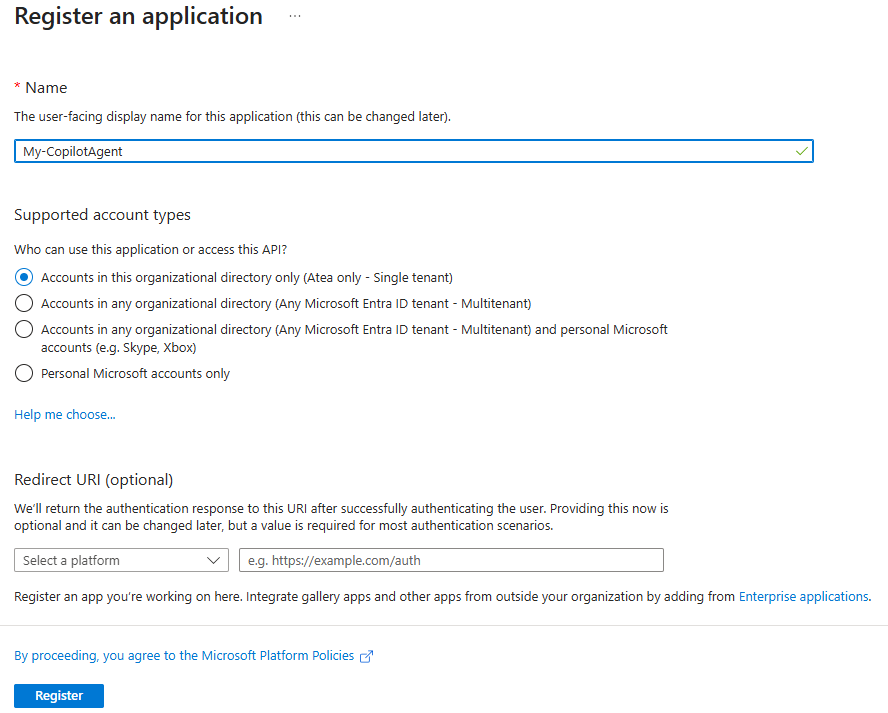
Just add a name and click Register
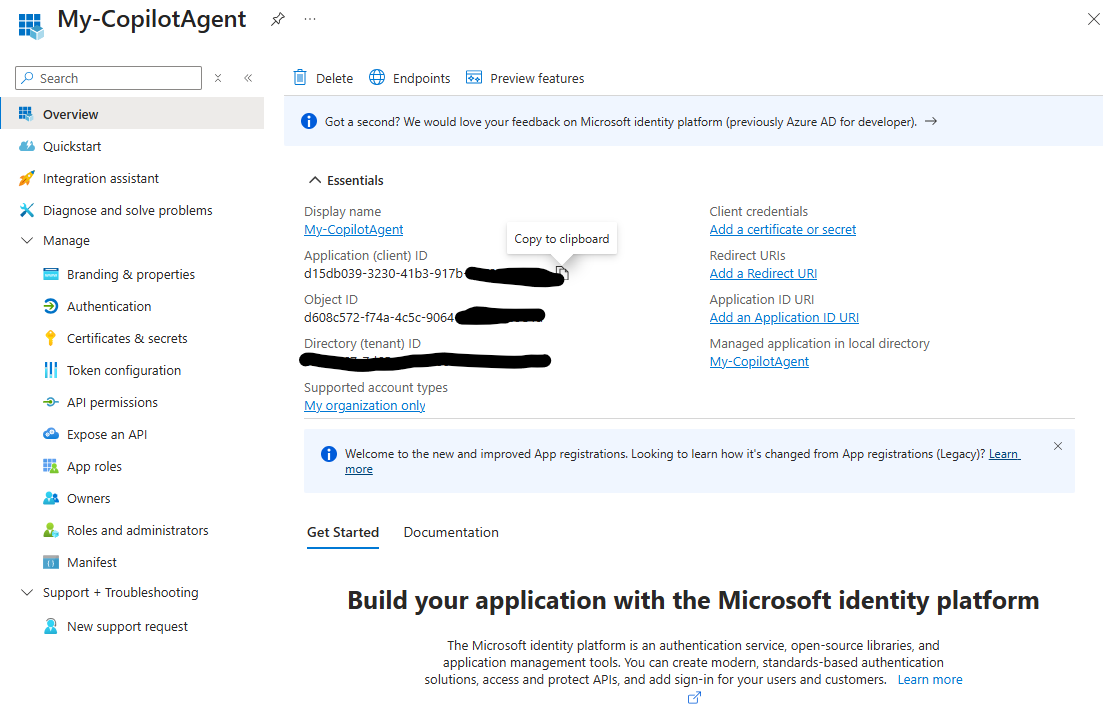
Note the Application (client) ID of the new application from the overview.
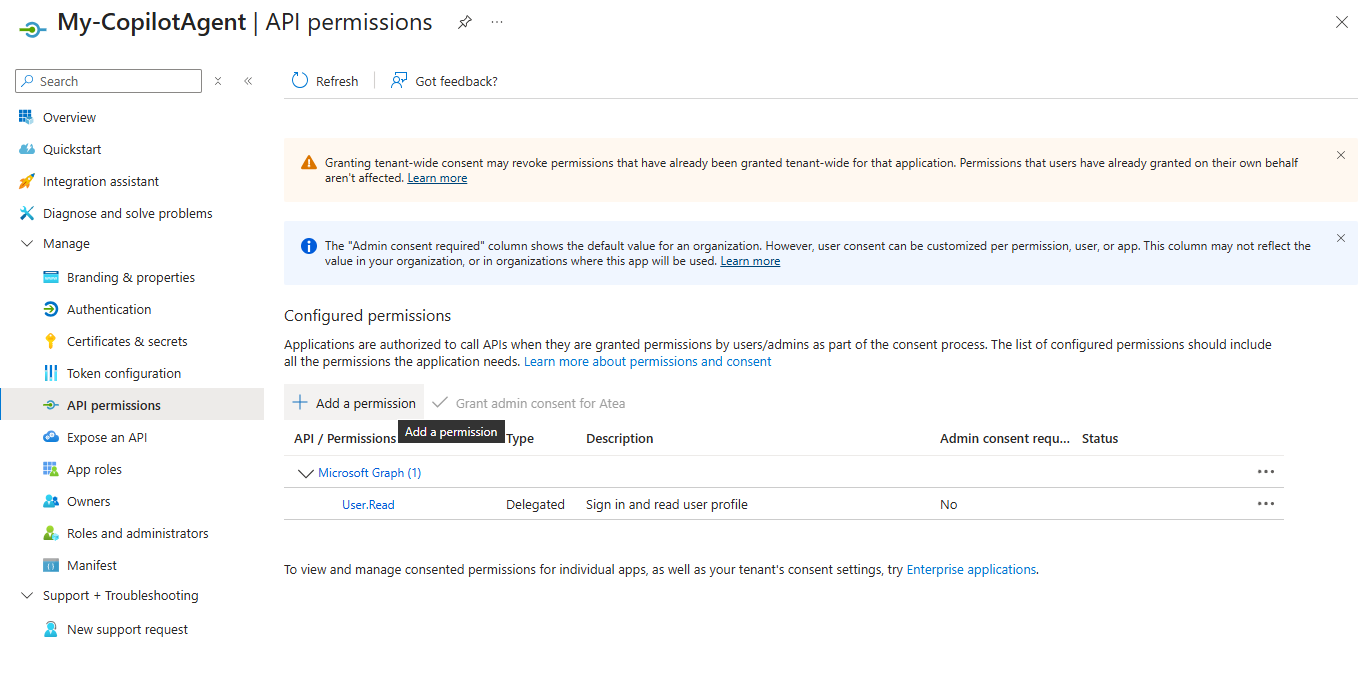
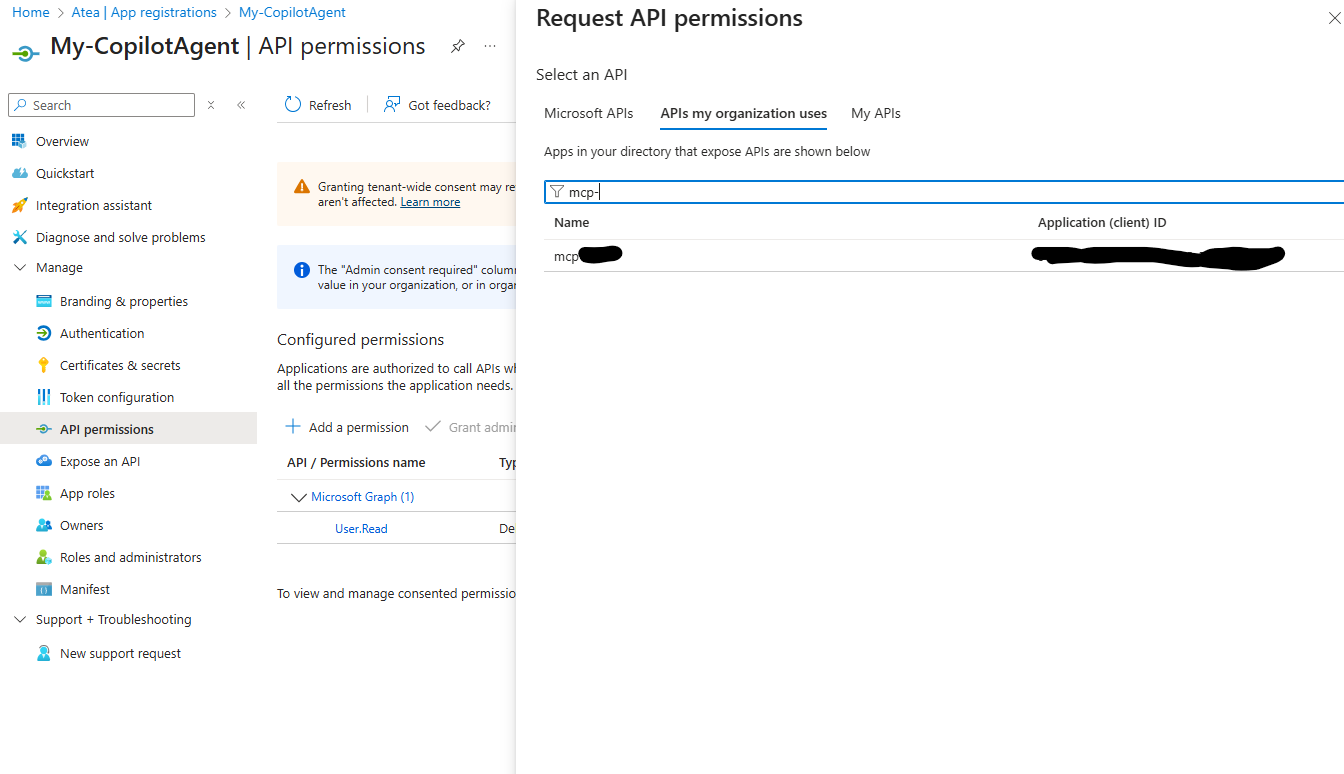
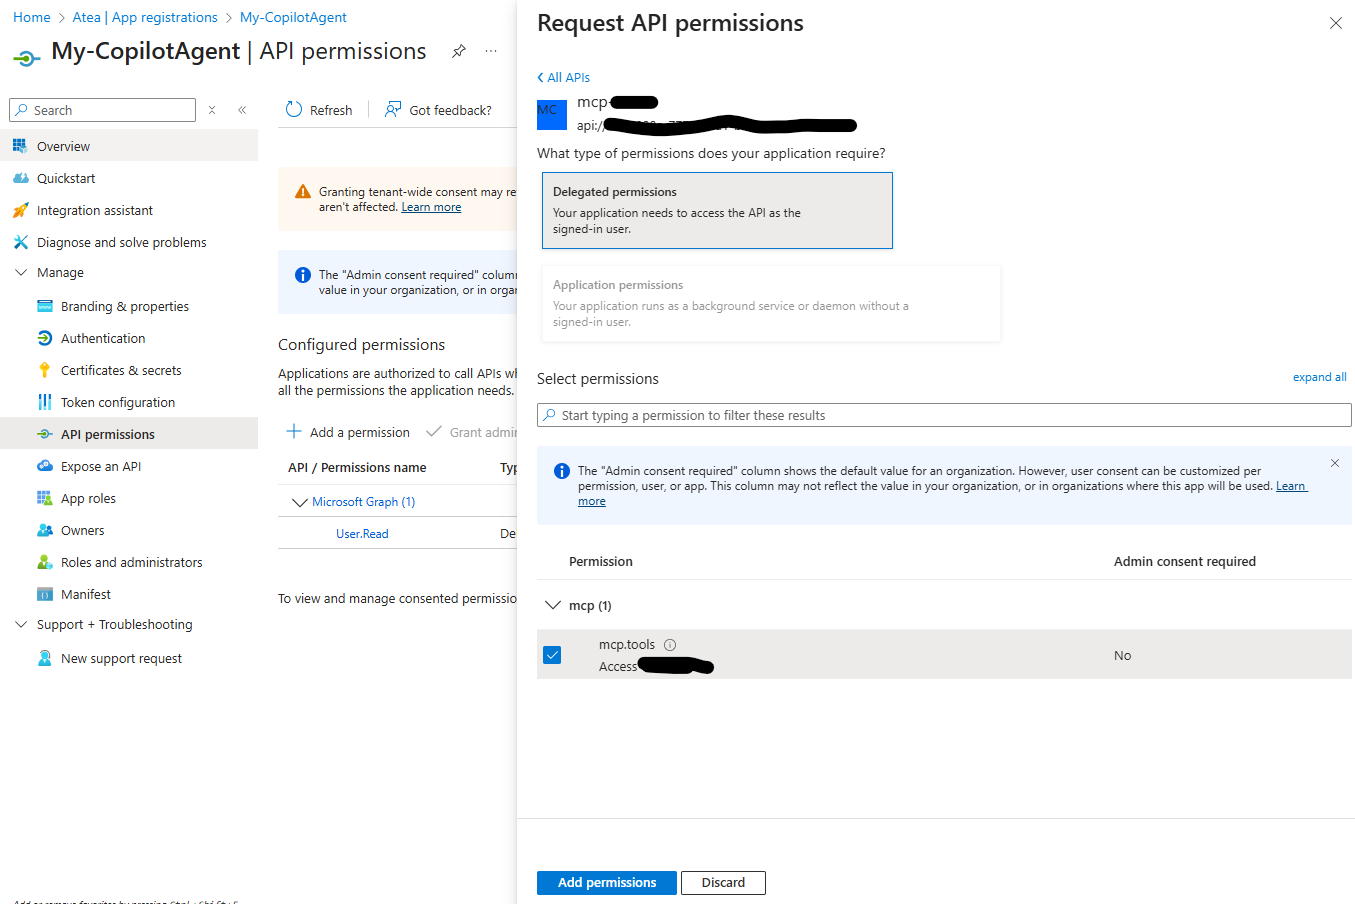
Select API Permissions. Here you need to add the API exposed by your MCP Server
You can search for the MCP Server Application under API’s my organization uses
Select the scope exposed by your MCP Servers Application and click Add permission
Go to the Certificates and secrets pane and add a new secret
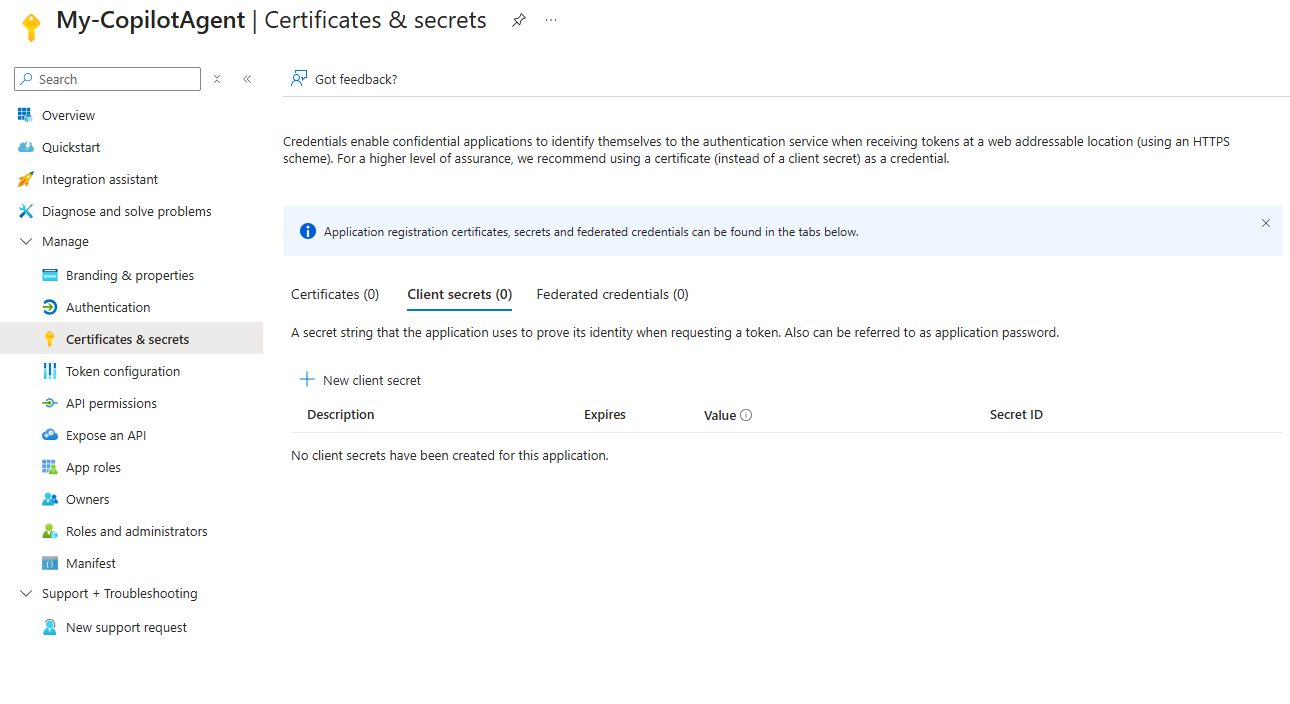
Save the value for later.
Create the Power Automate Custom Connector
Ensure that your Power Environment has the the Get new features early attribute set to true.
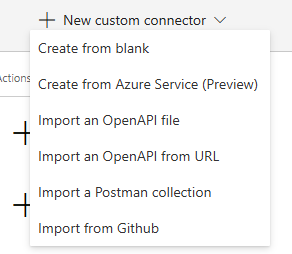
Go to Custom Connectors in Power Automate and click New custom Connector -> Import from Github
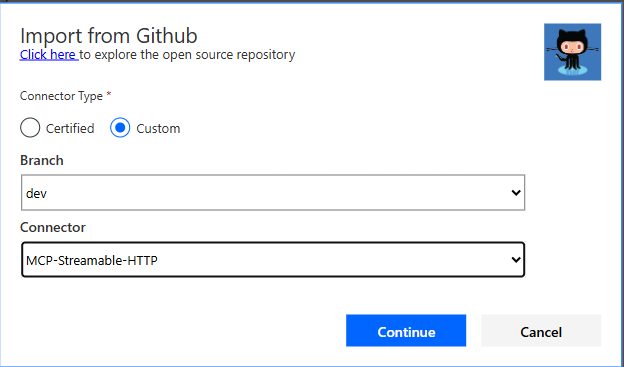
Select custom, find the dev branch and pick the MCP-StreamableHTTP Connector
In the General tab add the forwarded address from your VS Code forwarding as the Host an click Security. Update name and description as desired.
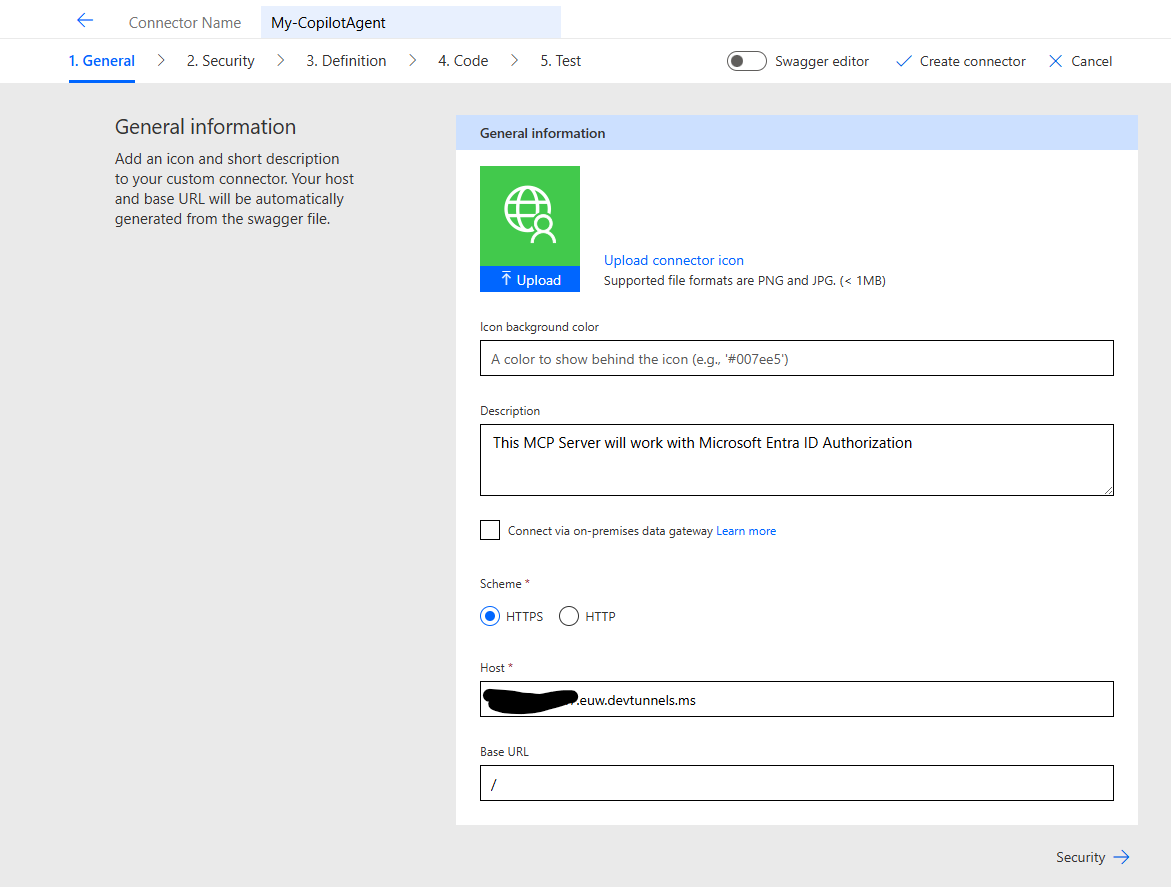
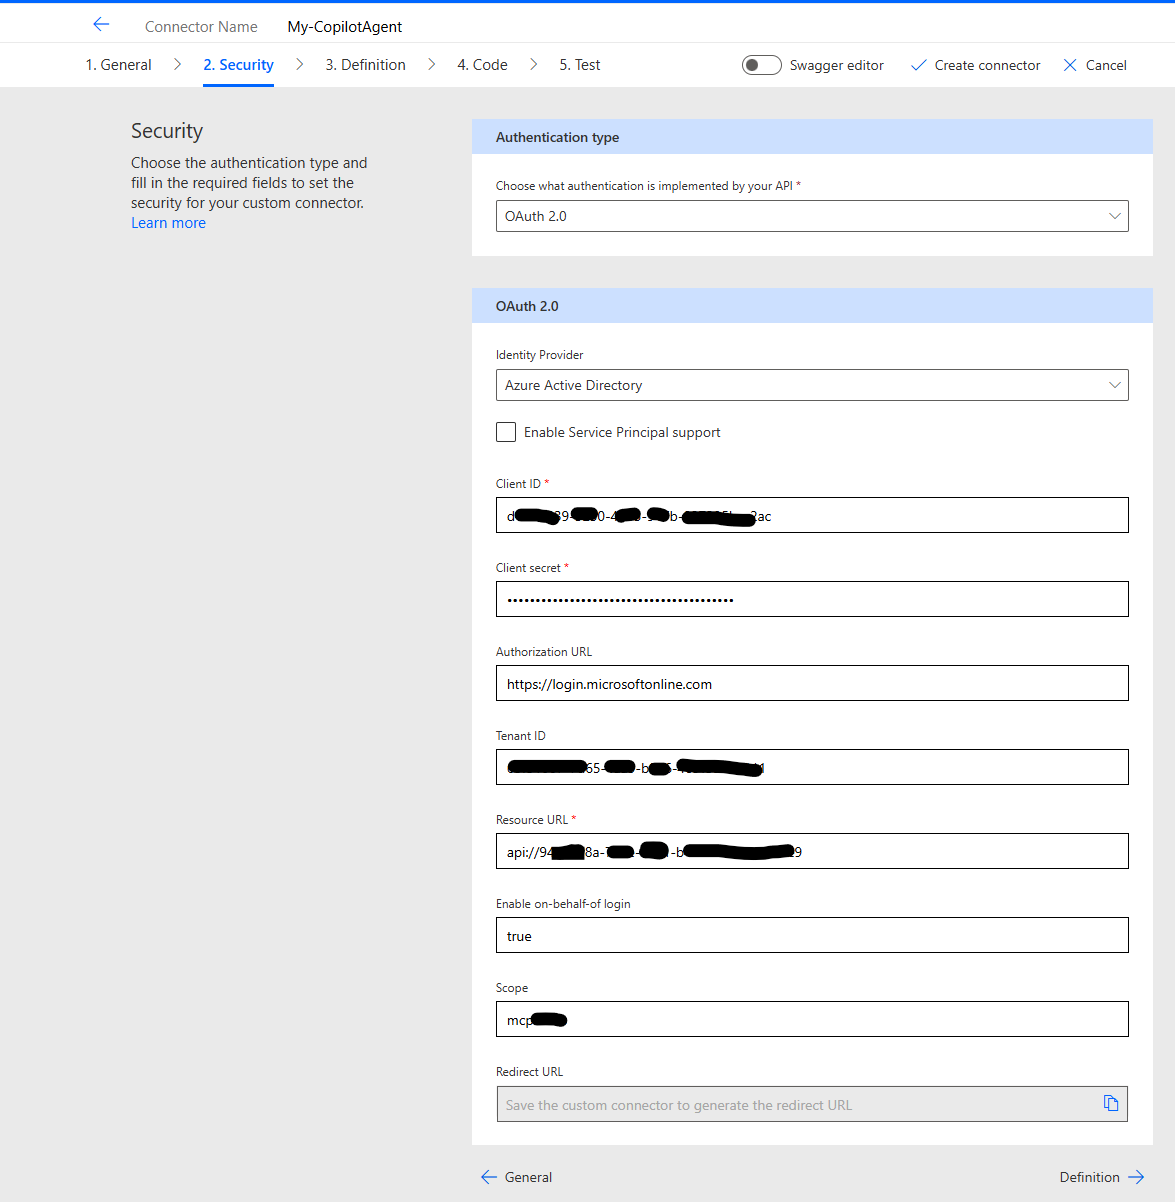
Fill out the form with the data you have collected so far.
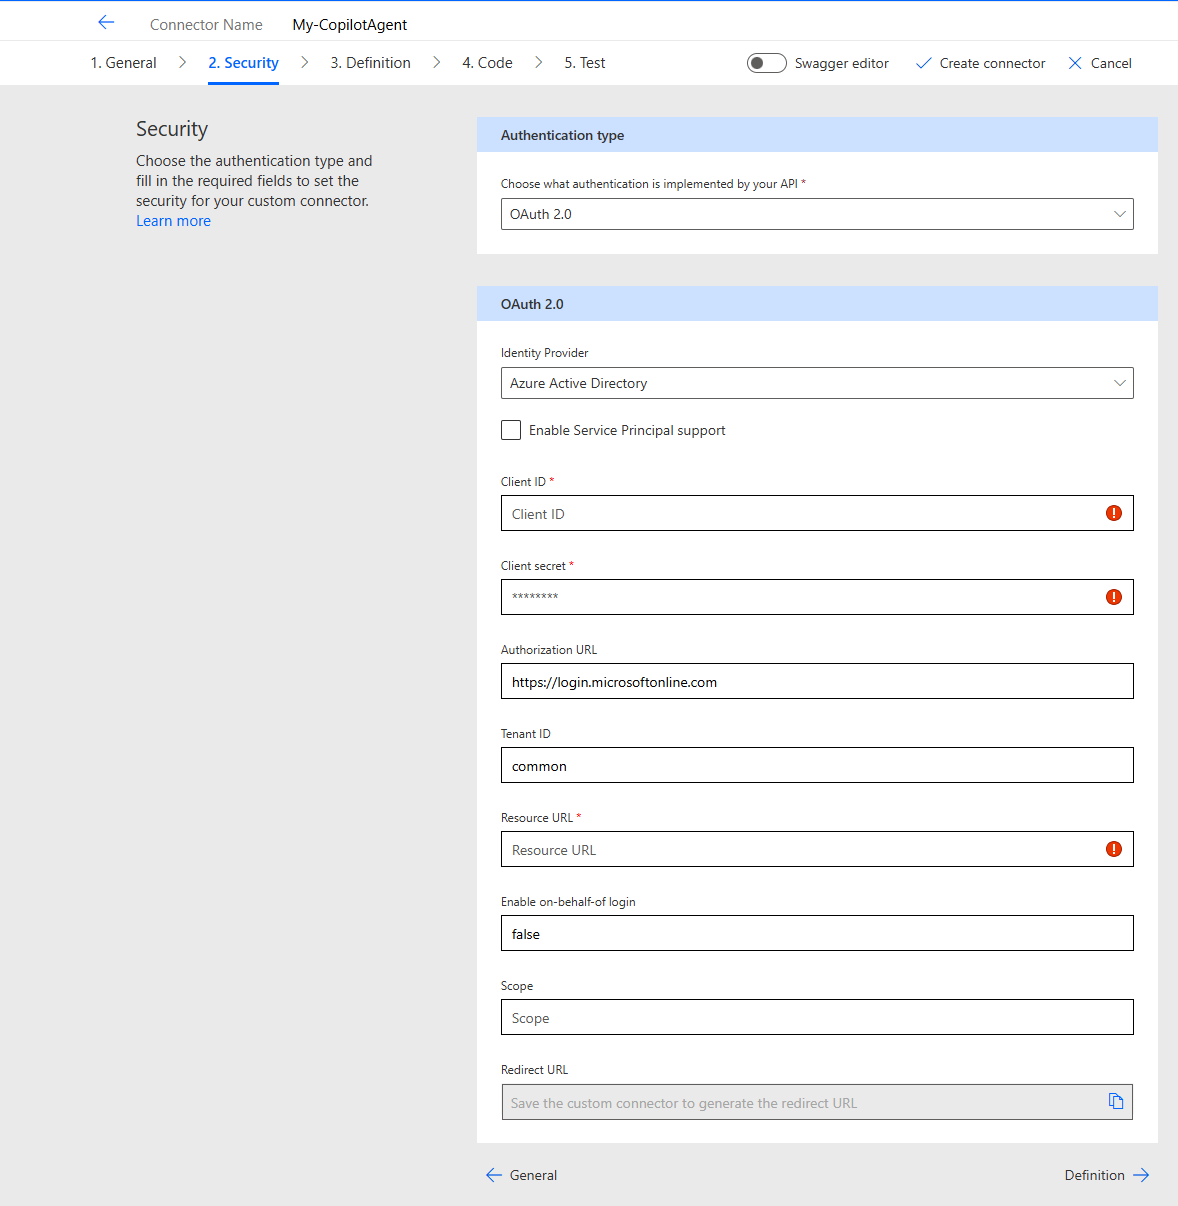
Authentication type: OAuth 2.0
Identity Provider: Azure Active Directory
Client ID: The Application (Client) ID of the new App Registration you have created.
Client secret: The secret you created for the application
Tenant ID: Your Tenant ID
Resource URL: api://MyAppRegistrationsGUID
Enable on-behalf-of login: true
Scope: MyAppRegistrationsScope
In my setup it looks like this:
Click on Create connector to generate the Redirect URL
Copy the Redirect URL

Update the App Registration
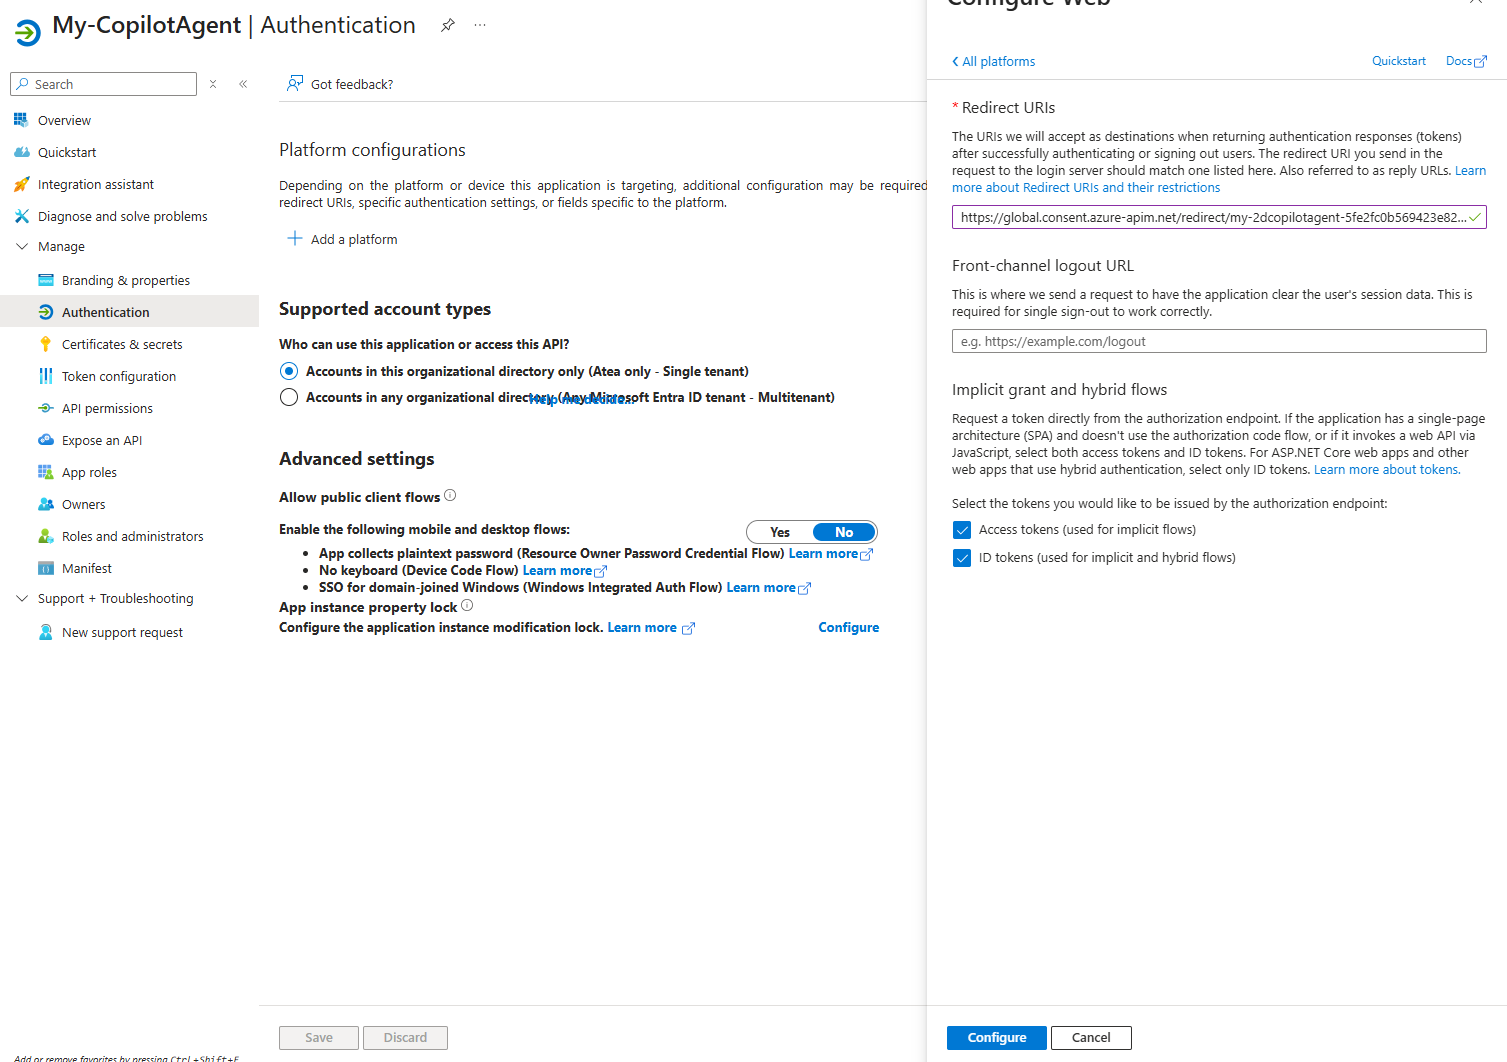
Go to your App Registration in the Azure Portal and select Authentication -> Add a platform
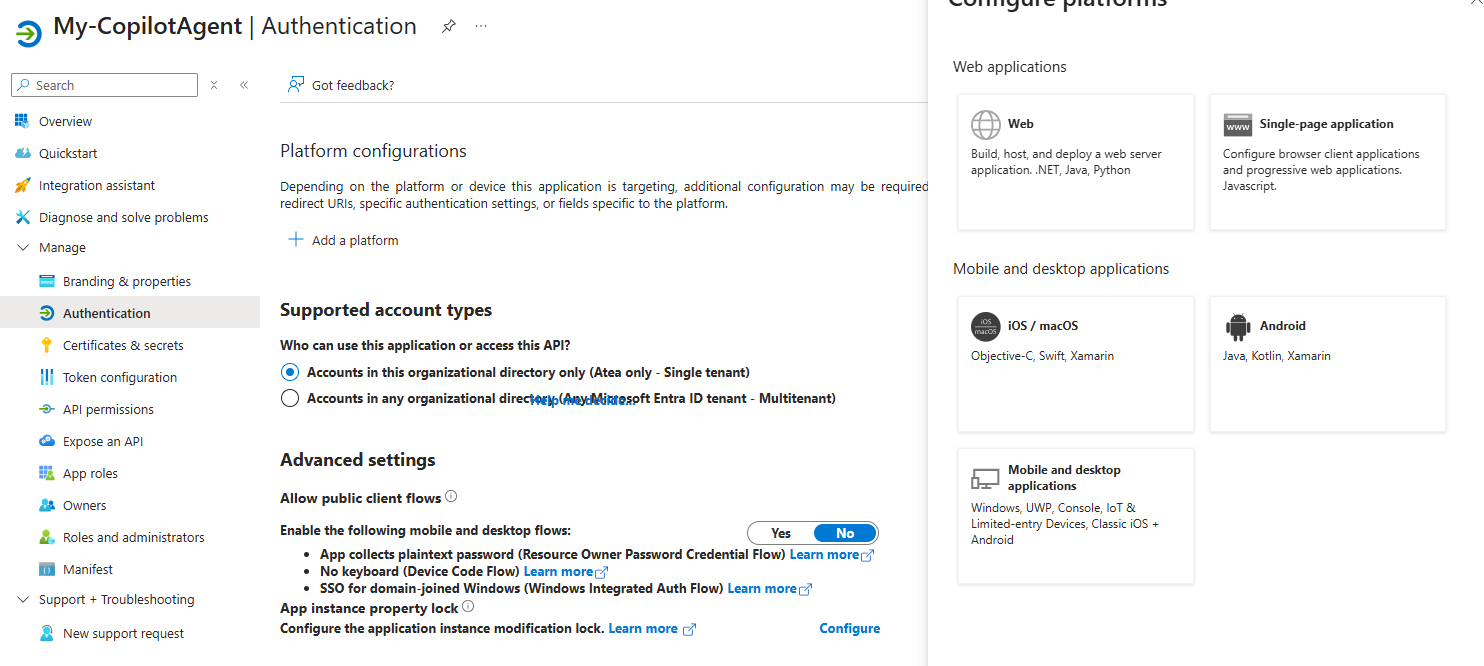
Select Web and paste the Redirect URI into the Redirect URIs text box, check the 2 boxes and click Configure.
Continue in Power Automate
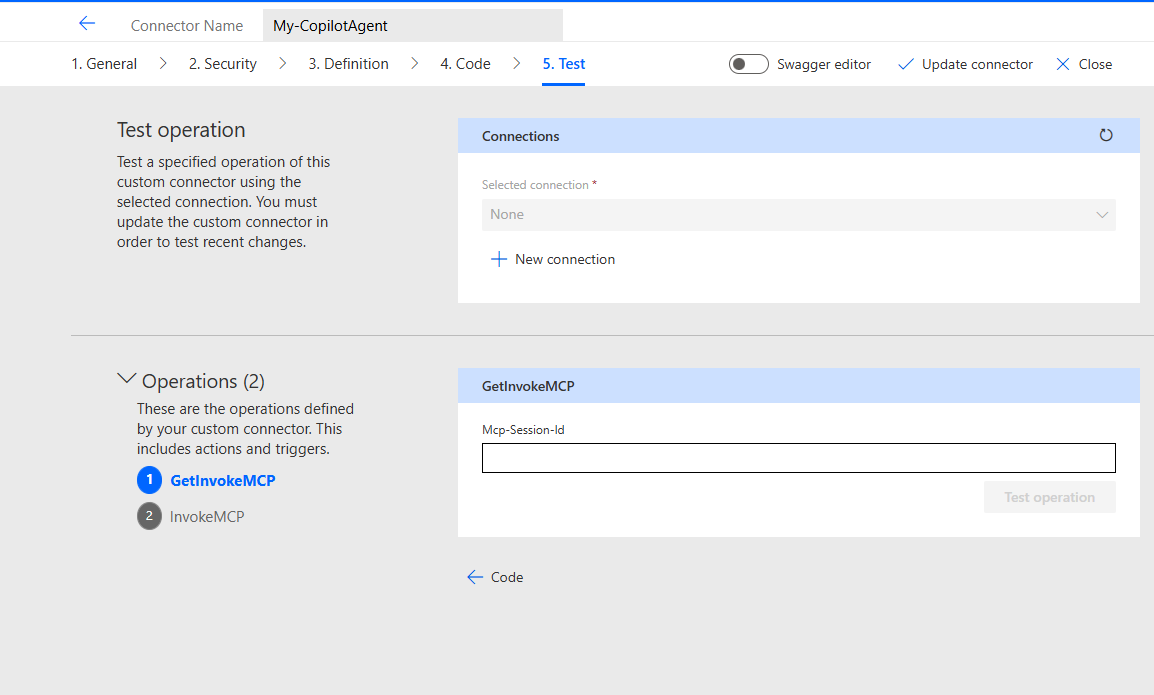
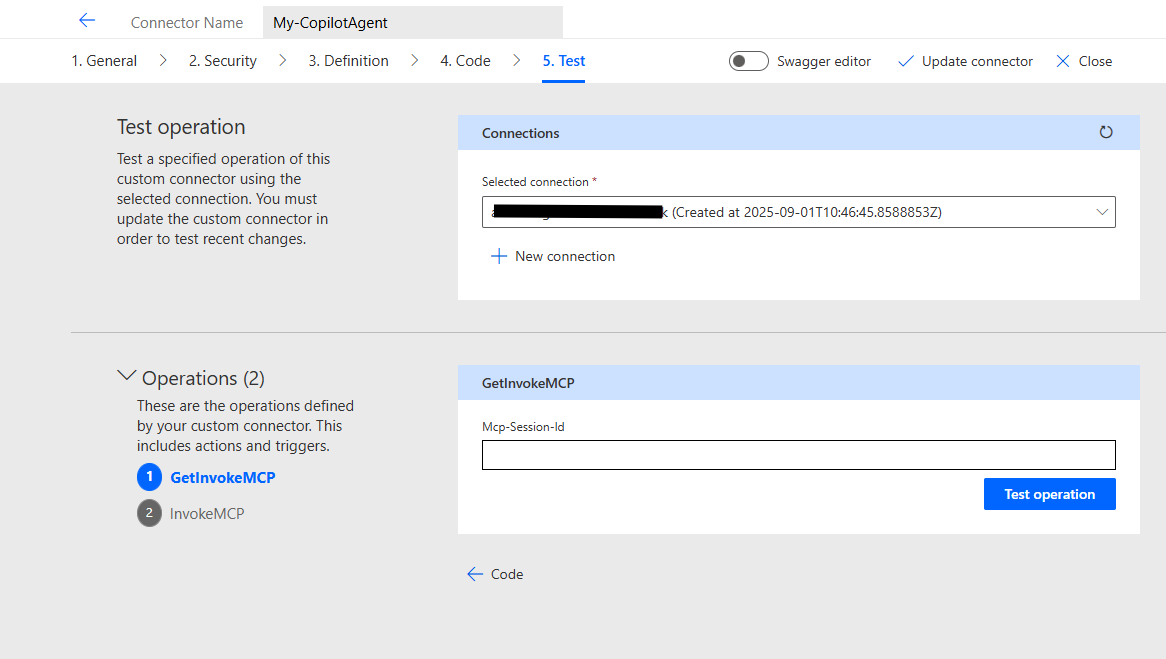
Go to the Test tab and click Update connector. Your Test tab should look like this now
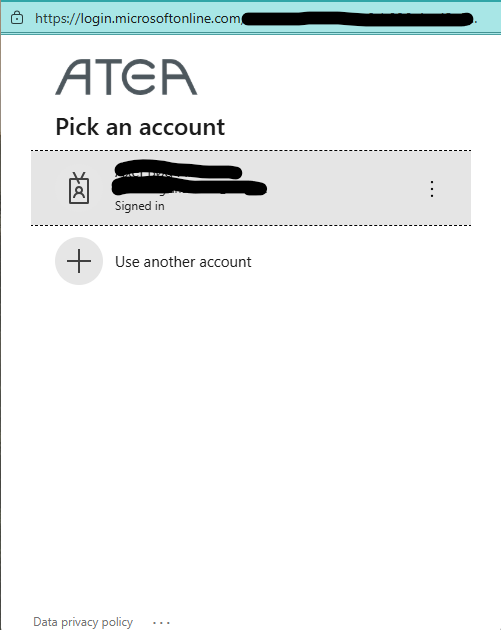
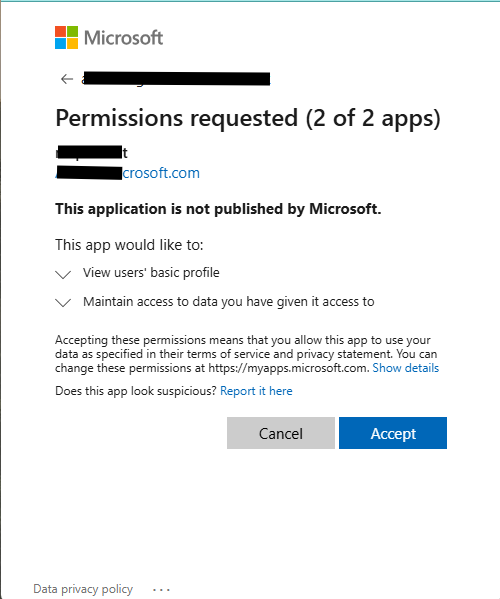
Click New connection and authenticate
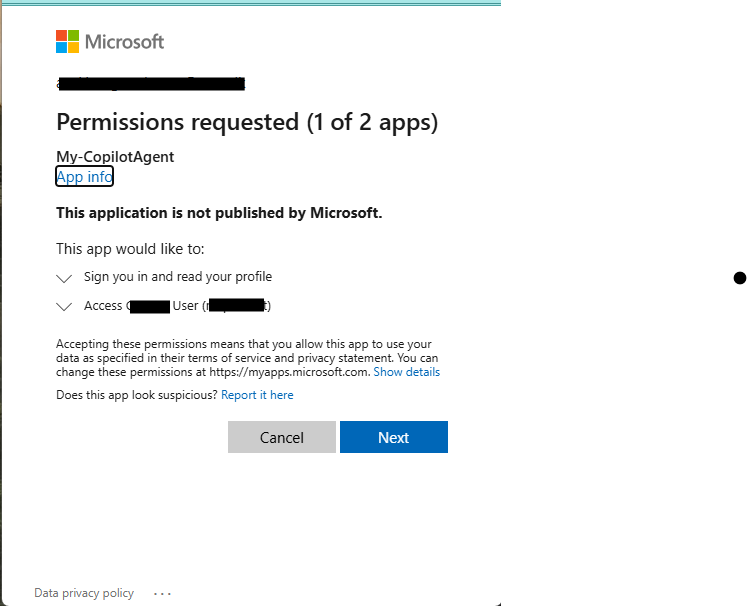
Accept the requested access
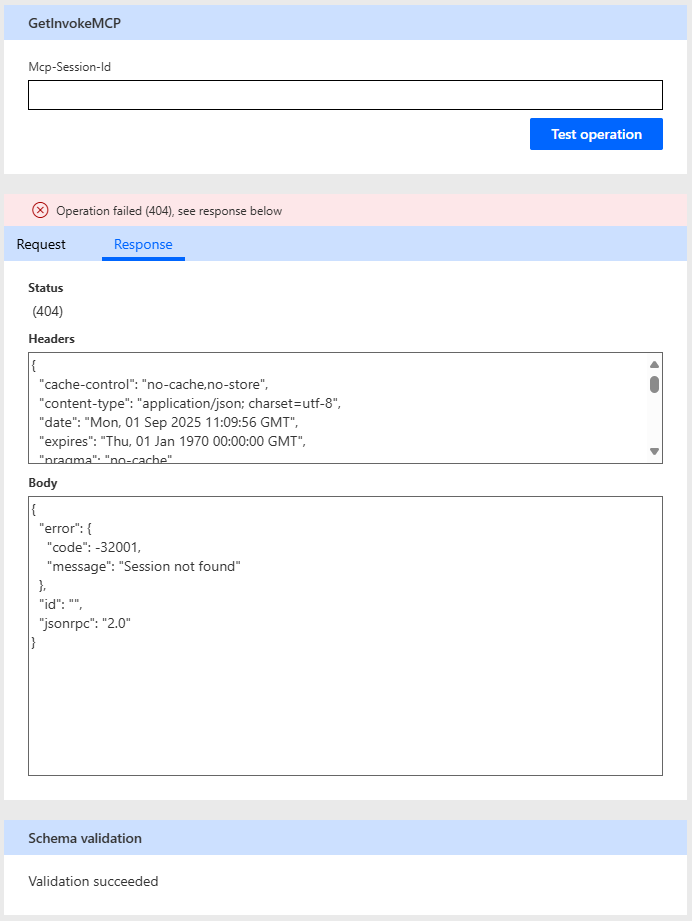
If the connection is created, you are ready to test your Custom connector. Make your MCP Server is running in your debugger, so it can be reached from Power Automate via the dev tunnel
If everything has been configured as described so far, the test will fail, but the schema validation will succeed.
Add the tool to an agent
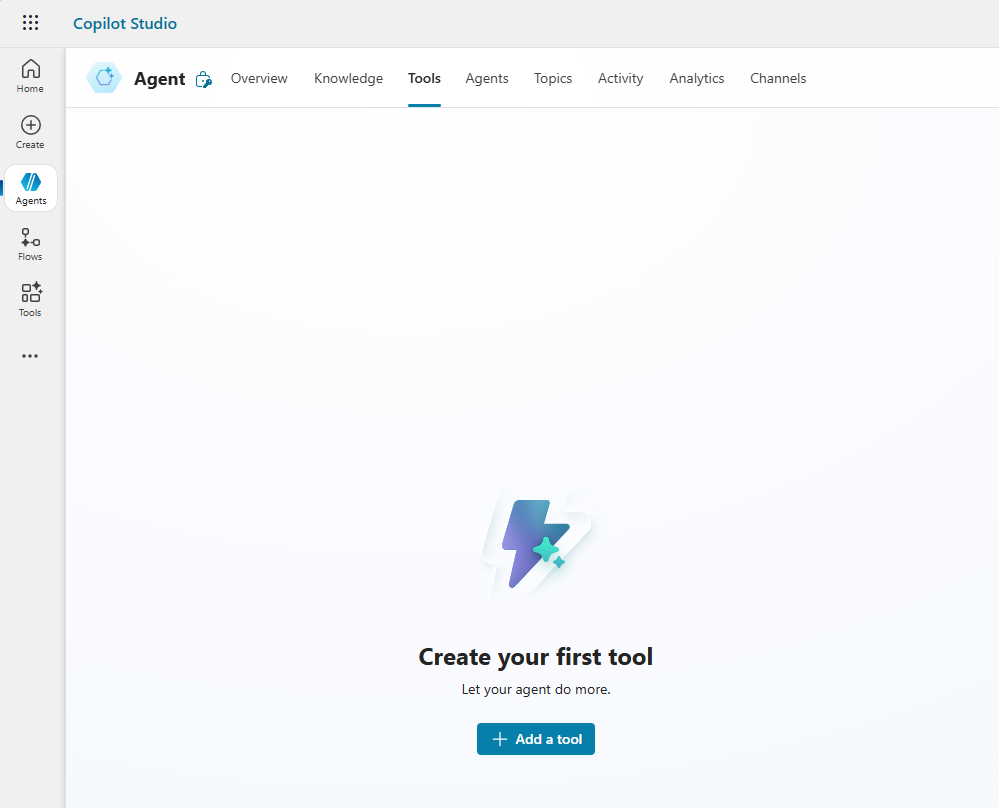
Go to Copilot Studio. Create a new agent or update an existing agent.
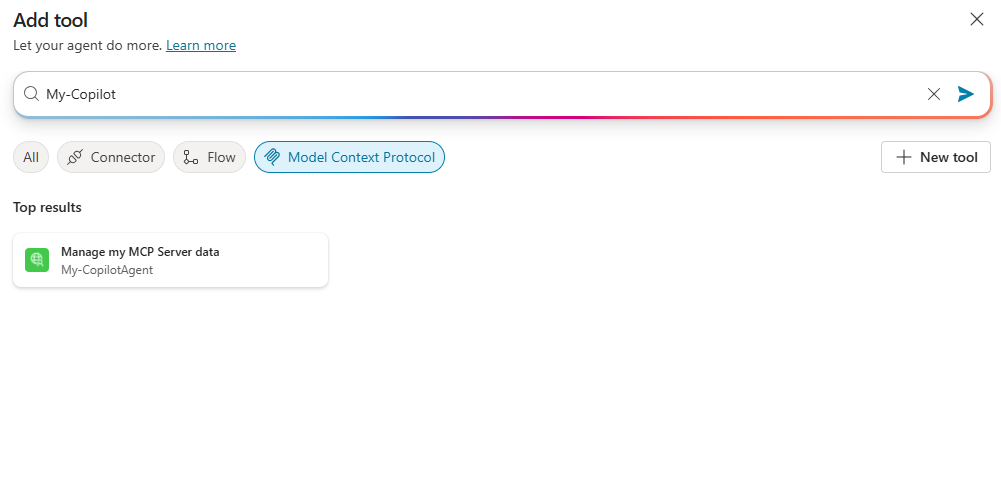
Go to the Tools tab on the agent and click Add a tool
Select Model Context Protocol and search for your new Custom Connection. It might take some time for the tool to show up - depending on how fast you created the Custom connection. Click on the tool:
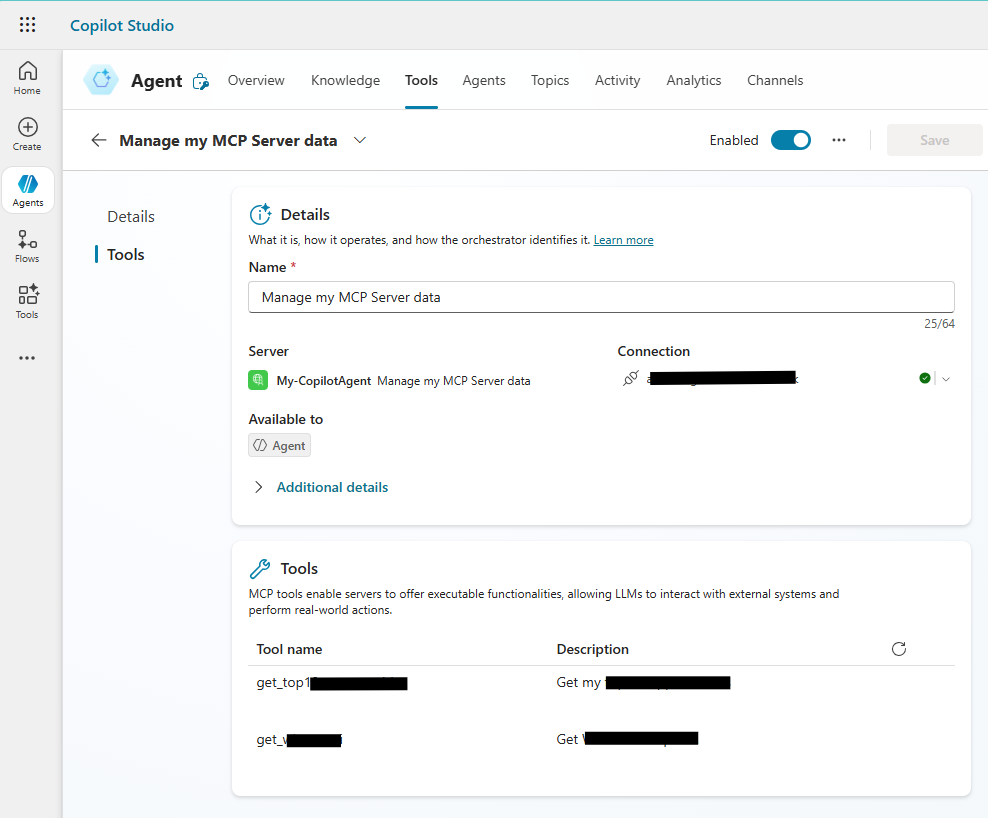
Click on Add and configure

With a little luck, you should now see your MCP Server and the available tools in the menu.
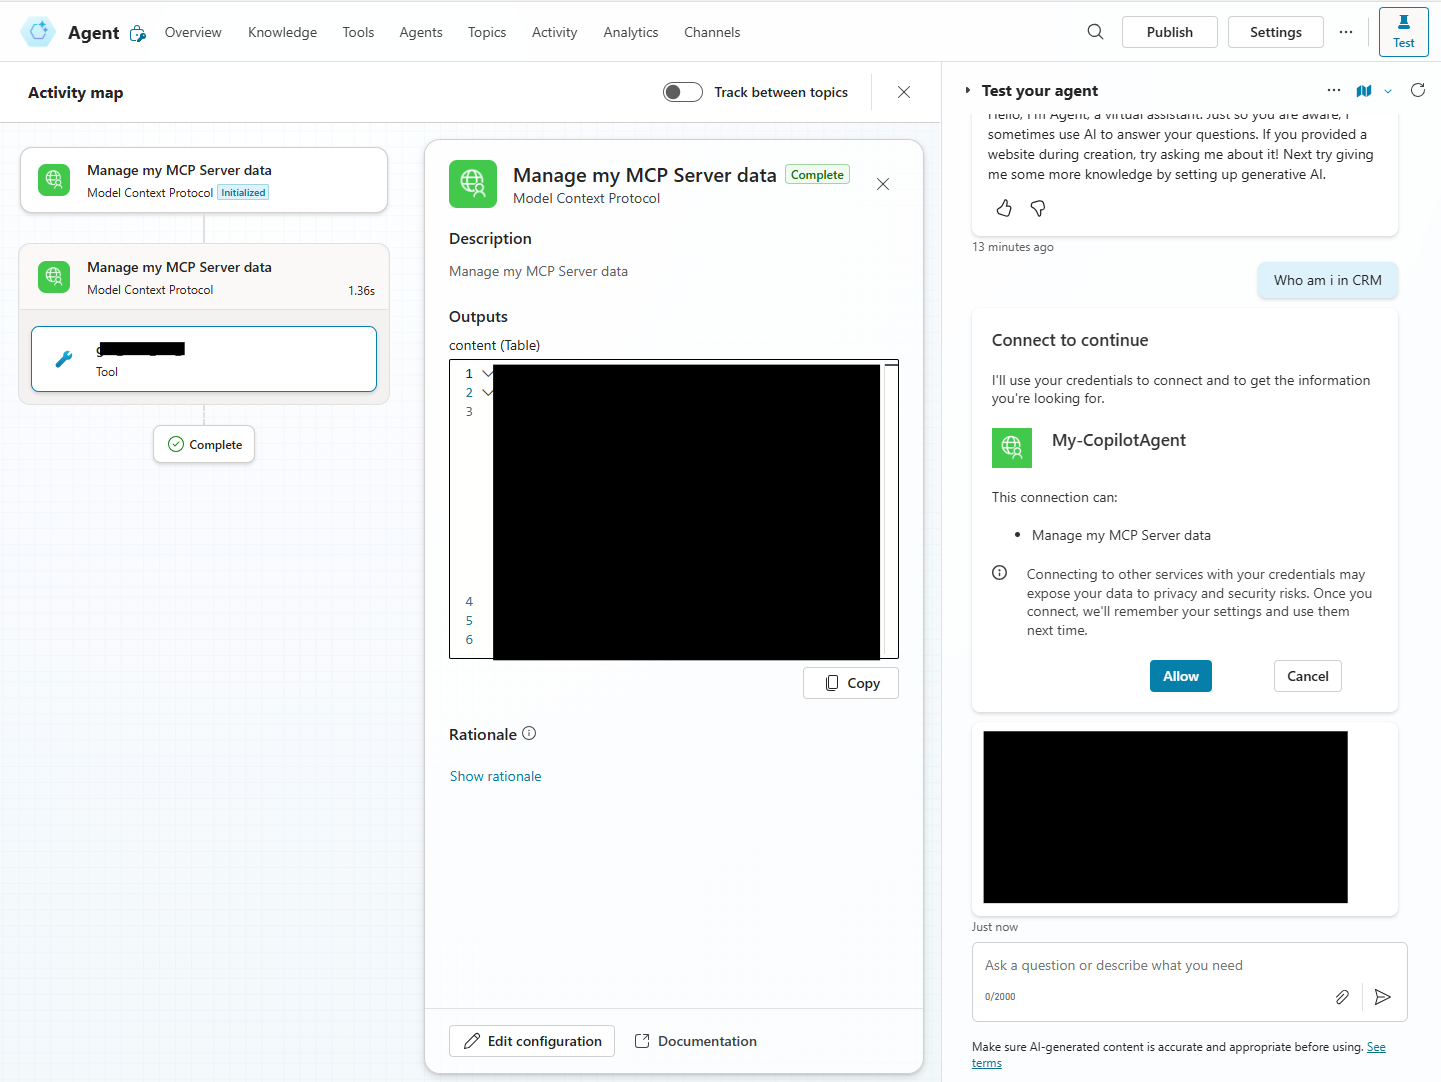
To test the implementation you need to punch in a prompt that inspires the Agent to run one of the tools in your MCP Server. It might look something like this
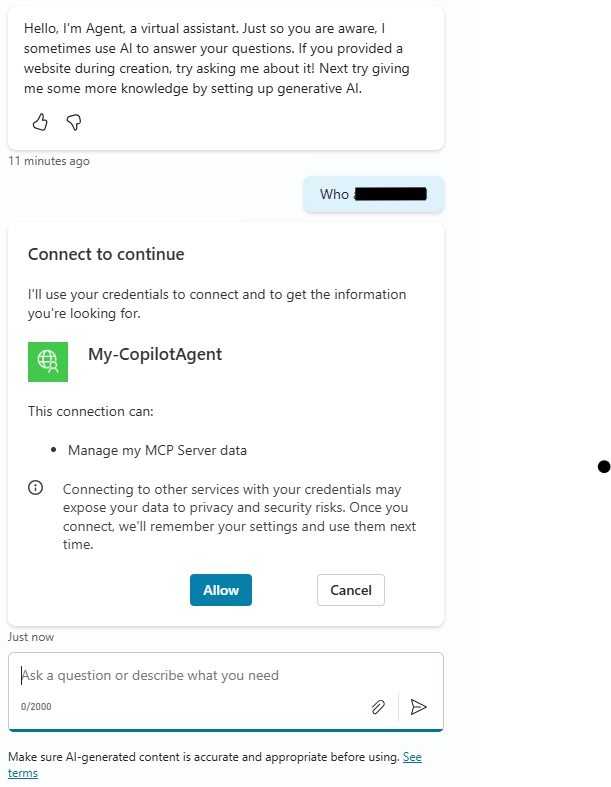
You need to click Allow to grant the agent the right to use your credentials to contact the Custom connector. This will allow your agent to execute the Custom connector and get a response from your MCP Server
Final thoughts
Be patient - the different steps in connecting the Custom Connector to the Connector and making it available in Copilot Studio need to be allowed sufficient time to propagate to the different systems involved.
It might be possible to get the test in the Custom Connection to work, but for this demo I just needed to know, that the schema is valid. As far as I can see, most of it is related to some of the API Management bits used by Power Automate. This step was particularly difficult to get past, since it seemed to indicate, that something was wrong.
Once the tool is setup in an agent in Copilot Studio, the agent can be published to your enterprise and accessed safely by your end users.